Flower is one of my favorite subject to paint. For me, Flower is a subject that almost everyone can enjoy. Artworks that feature flower is a very easy kind of art to perceive and does not need any art background to appreciate the beauty of flowers. And today, I want to share with you how I paint my Dancing tulips using oil paint. These lovely pink tulips were calling me to paint them when I saw the photograph of them (Yes, I paint from a photograph). So Let's start!
Material I use 1. Pre-stretched canvas 60x90 cm. (my favorite size) 2. White Gesso for priming the canvas 3. 2B graphite pencil for drawing 4. Oil paint. I use Art Spectrum (Crimson, Sap green, Ochre, Burnt sienna, Burnt umber, Viridian green and Ivory black) and Daler Rowney (Rose madder) 5. Winsor & Newton Liquin impasto for glazing 6. Oil paint brushes. (I use various sizes and material(Hog hair/Synthetic) 7. The reference photo
Method 1. As usual, I start by priming my canvas with gesso for 2 coats. Then I transfer the image from my reference photo to the canvas using grid method. This method helps me to get the right proportion of the flower on the canvas. I don't normally copy exactly the same as the reference. I always add some of my own creativity into the image to make the composition looks more interesting.
2. I start blocking in the background with a thin black paint and some green where all the leaves are. Then I apply all the cast shadows on each flower with the same paint that I use for the background and let dry. This technique helps when I paint another layer on the flower so I will get a soft and subtle cast shadow on the flower straight way without trying to paint it later on.
3. I decide to apply a second layer on the background. Just to make the flower which is the main subject more stand out. Make it easier to paint the flowers. Especially on the light petals.
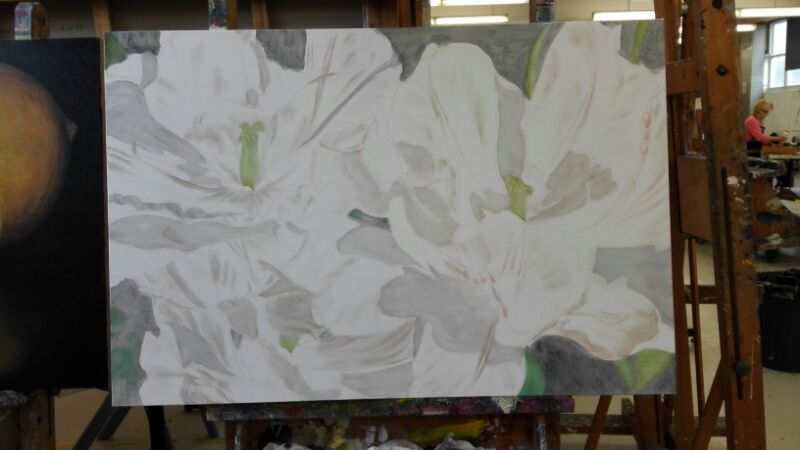
4. Now, I start painting on the first flower. I work on it section by section, petal by petal, bit by bit.
5. As the flower is quite bright and most of the petals are white with a hint of pink so it does not require many layers. I decide to work on the details of the flower straight away as I move along.
To achieve soft edge finish of each petal, I use a soft dry round brush (size 2) to glide over the edges until I get the soft edge that I am happy with.
6. And I move on to the second flower.
7. And the last one.
8. Once I completed all the flower, I let the painting dry for a week and come back to see what it needs to make the painting looks more complete. I can see that it needs a darker tone on some areas and the petals look too lolly pink.
9. I apply the darker tone using a glazing technique (A transparent layer of paint applies over a dried layer). And for the flowers that are too pink, I use the same technique with Yellow ochre and Crimson to glaze over the pink area. And here is the finished painting.
And this is a slideshow video of the whole process.
Today I want to show you step by step process of how I painted the still life of peeled lemon. This painting is part of my still life series that I have been working on this year. I planned to paint fruit, flowers and objects that have a range of symbolic meanings. The peeled lemon is probably one of the most popular symbolic objects that many artists used it to feature in their painting from 17th century Dutch Still Life paintings up until now. So let's start it.
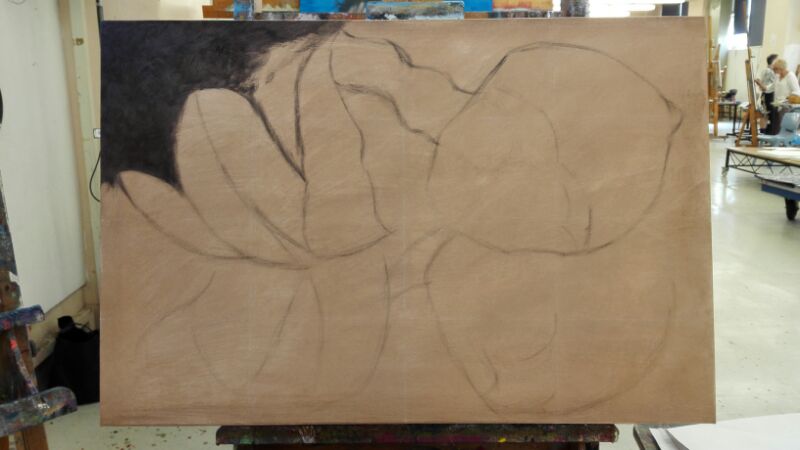
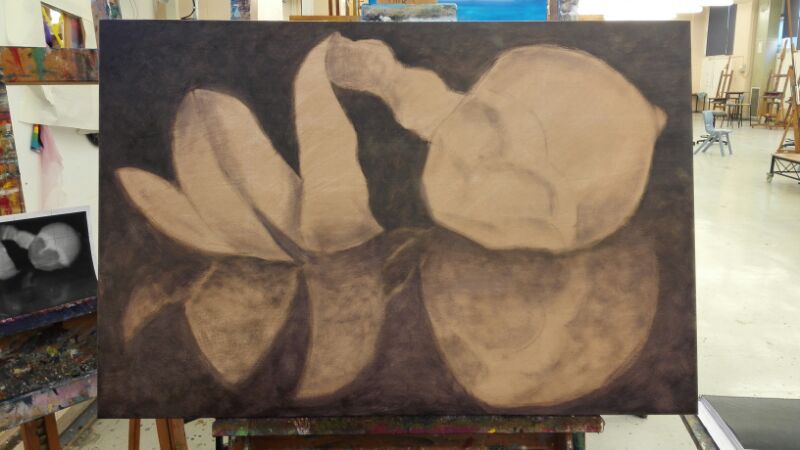
Material I used 1. Pre-stretched canvas 60 x 90 cm. 2. Oil paint. I use AS or Art Spectrum brand. Colour : Ivory black, Titanium white, Lemon yellow, Yellow ochre, Burnt sienna, Burnt umber, Ultramarine , Sap green and Spectrum crimson. 3. Brush. I use various sizes and brands. I use a long flat brush size 6 for the background, Filbert brushes size 2, 4, 6 for rendering the lemon and a round brush size 2 for the details. 4. Acrylic paint : Burnt sienna to tone the canvas as a base colour 5. Oil painting medium. I use Schmincke medium W as it allows me to dilute the oil paint with water and also clean the brushes with water, too. No turps require! (Link about medium W) 6. White colour pencil for drawing the subject outline on canvas. 7. Reference photo Let's start! 1. I start by priming the canvas with gesso for one coat. I use Winsor & Newton white gesso primer ( I got this one on special from Eckersley) but you can use any brand that you have. Once dried, I mix the acrylic paint (Burnt sienna) with water in quite a thin consistency and apply thinly on the whole canvas. And the canvas is ready to paint! 2. Base on my reference photo, I use grid method to transfer the image onto the canvas (For anyone who have no idea about the grid method, Here is a link about it : Grid method). Then I use a white colour pencil to draw the line and roughly draw the lemon including the shadow. (Sorry I don't have a photo for this stage.) 3. I figure out the easy way to start this painting is to block in all the background first. So I use a small brush with a thin black oil paint to draw all the outlines of the subject on top of the colour pencil drawing and start to block in the background. I didn't use the black colour from the tube. I mix my own black colour by mixing one part of Ultramarine and one part of burnt sienna for just enough to cover the background area of the top part of the painting.
4. Continue blocking in the top part using a long flat brush until cover the whole area.
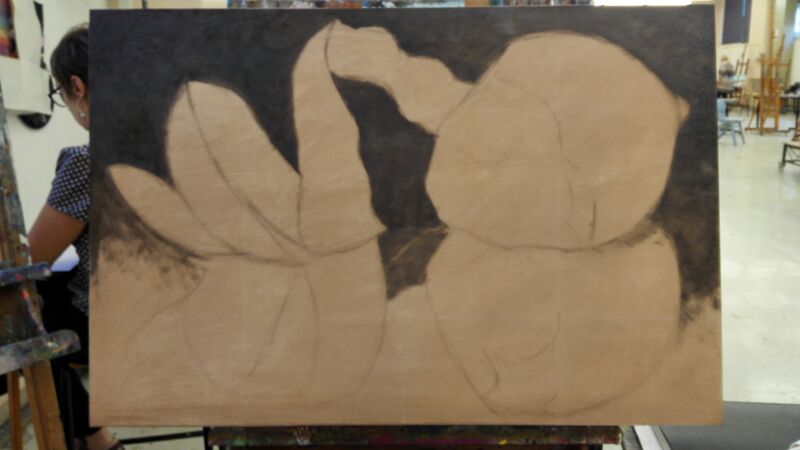
5. On the bottom part of the painting. I want to have a hint of purple in the background to generate glow into the painting. So I add more ultramarine and slowly add a hint of Crimson into the black mixture and play around in mixing until the right colour that I am happy with. And I continue blocking in the background of the bottom part. I also start to apply a thin layer of the black paint onto the reflection of the lemon.
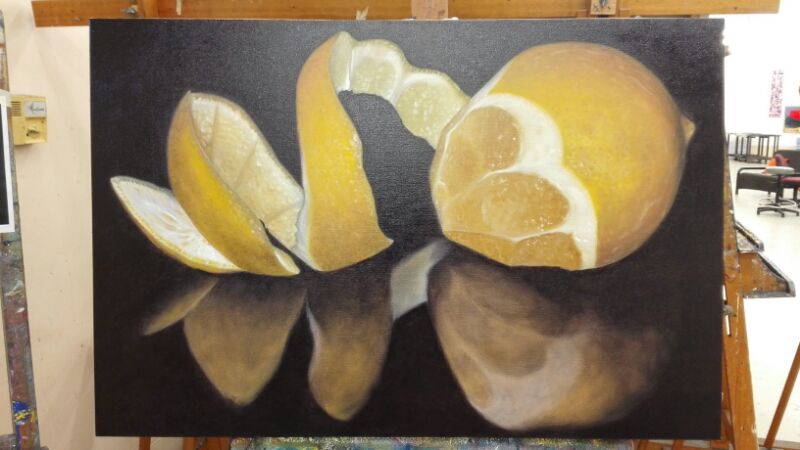
6. Now I start on painting the lemon. Again I start from left to right. From the peeled part of the lemon. I didn't paint much detail at this stage. Just to cover up the area first. So at this stage, it will look quite flat.
7. Then move on to the lemon. I add little details here and there. Basically just to please myself when I paint along. I find that it really help me feel more enjoyable in painting. I also apply some darker tone onto the shape of the lemon so it looks more round.
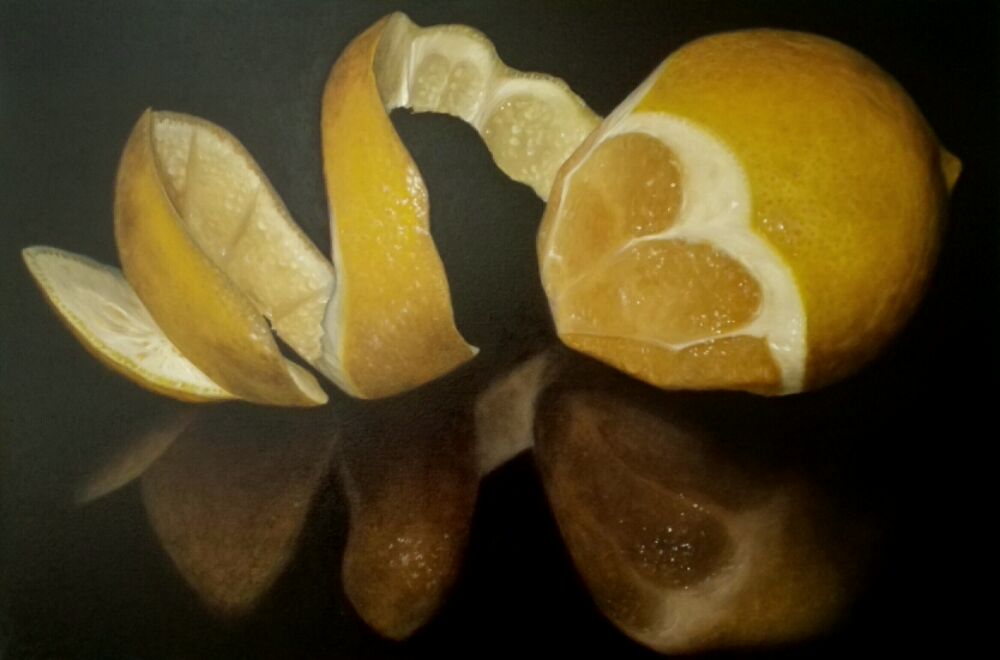
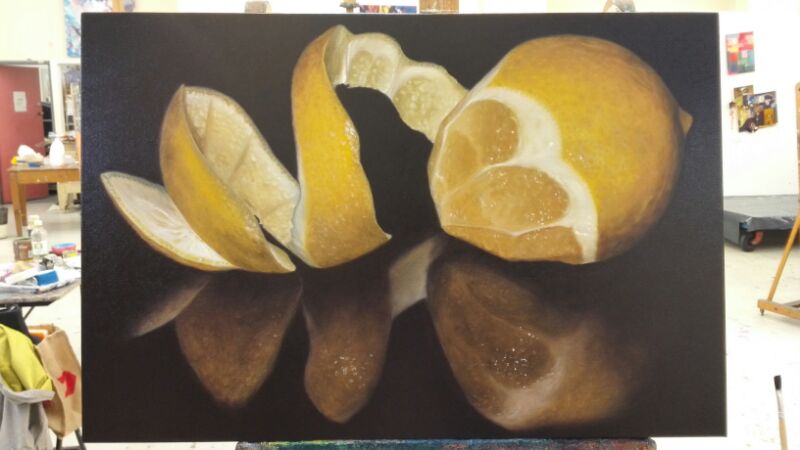
8. Once the whole lemon is painted. I start working on the details. At this stage, I work with the reference photo closely. I didn't normally copy exactly as the photo is but I look at it to get the essence feeling of it and paint how I feel that I think it should be. I find that to do this I feel less stress than copying every bit from the photo.
And the details.
8. Once I am happy with the lemon. I move on to the reflection. Again I paint it quite flat just to cover the area.
9. Then I apply the second layer to the background with the same black mixture until cover all the background area.
10. I came back for work on the reflection again. I add more details and working on tonal value of the whole painting. I spend quite some time at this stage to get the result as close as the reference photo and as how I feel until I reach the stage I am happy with the painting. And Ta Da !
And this is a slideshow video of the whole process.
Hello everyone.!! Today I will show you how to draw a realistic dog portrait using soft pastel and pastel pencil. I love using pastel for portrait painting. It is very forgiving medium and blend so easy with your finger. it can give you and soft or rough finish. It does not need any messy material like water or medium to dilute it. No brush, No Canvas, Just paper. I hope you enjoy.
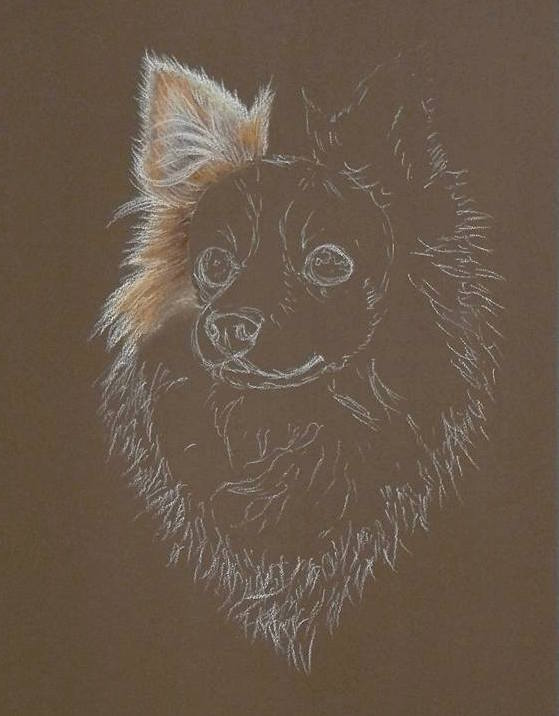
Material I use 1. Canson sanded pastel paper ( You can use any paper that suitable for pastel) 2. Artist soft pastel (Any brand). I use Winsor and Newton. The student grade also works really well. 3. Pastel pencil for fine details. I use Derwent and Stabilo. 4. Kneadable rubber for erase/remove unwanted area or lines. 5. A reference photo. For this tutorial, I use the photo of my mom's dog 'Zumo'. He is a Pomeranian. My mom asked me to paint him many times so today is the day.
Methods 1. I start to draw a rough sketch of the dog's head from the photo. Just to give me an idea of the overall image and how it will fit on the paper. I pay attention to the details around the face such as eyes, nose, mouth etc. I use a white pastel pencil. Then I start the toning process with soft pastel. I always start from the top left of the image as I am a right handed to prevent smudge on my drawing. Blending with your finger (the pinky one works best for me). Adding some hair-lines with pastel pencil as you go.
2. Gradually adding more tone and details from left to right and from top to the bottom. Work closely with the reference photo to see any tonal values, light and shade areas, hi-lights etc. Blend with your finger to soften the area as you wish.
3. After I have finished the whole image from top to bottom. I work back and forth to check any details that I have left. Keep adding more details that I can see from the photo. I adjust the portrait a bit to make it fit right on the paper. and Here the finished portrait. Ta da !
Compare with the reference photo
Try how it looks on the wall?
See it in Video version on You Tube You can see a video the process how I draw a dog portrait via the link below. It is a different dog but it will give you and idea of how I did it. I hope you enjoy. Please feel free to share if you like.